SOLVED Cannot repair member file [l:10]"opencl.dll"

Joined
Jun 6, 2016
Messages
53
Reaction score
2
I have 2 computer upgraded from Windows 7
One computer OK - desktop .
Another HP laptop with problem below

I tried :

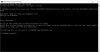
Dism /Online /Cleanup-Image /StartComponentCleanup
Dism /Online /Cleanup-Image /RestoreHealth
sfc /scannow
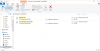
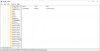
findstr /c:"[SR]" %windir%\Logs\CBS\CBS.log >%OUTF%


and copy file from normal computer - no luck
The same problem

Boot screen Orange-Red
___________________________________________________
2016-07-08 15:03:11, Info CSI 000056db [SR] Repairing 1 components
2016-07-08 15:03:11, Info CSI 000056dc [SR] Beginning Verify and Repair transaction
2016-07-08 15:03:11, Info CSI 000056de [SR] Cannot repair member file [l:10]"opencl.dll" of microsoft-windows-RemoteFX-clientVM-RemoteFXWDDMDriver-WOW64-C, version 10.0.10586.0, arch Host= amd64 Guest= x86, nonSxS, pkt {l:8 b:31bf3856ad364e35} in the store, hash mismatch
2016-07-08 15:03:11, Info CSI 000056e1 [SR] Cannot repair member file [l:10]"opencl.dll" of microsoft-windows-RemoteFX-clientVM-RemoteFXWDDMDriver-WOW64-C, version 10.0.10586.0, arch Host= amd64 Guest= x86, nonSxS, pkt {l:8 b:31bf3856ad364e35} in the store, hash mismatch
2016-07-08 15:03:11, Info CSI 000056e2 [SR] This component was referenced by [l:125]"Microsoft-Windows-RemoteFX-VM-Setup-Package~31bf3856ad364e35~amd64~~10.0.10586.0.RemoteFX clientVM and UMTS files and regkeys"
2016-07-08 15:03:11, Info CSI 000056e4 [SR] Repair complete
2016-07-08 15:03:11, Info CSI 000056e5 [SR] Committing transaction
2016-07-08 15:03:11, Info CSI 000056ea [SR] Verify and Repair Transaction completed. All files and registry keys listed in this transaction have been successfully repaired
----------------------------------------------------------------------------------------------------------------
 

Attachments

  • opencl.dllpng.png
    opencl.dllpng.png
    44.8 KB · Views: 774
  • sfcdetails.txt
    58.4 KB · Views: 599

Regedit32

Moderator
Joined
Mar 4, 2016
Messages
3,617
Reaction score
1,139
Hi Moiseyo,

There are occasionions when a SFC report returns a false/positive error with the particular dll file you are having troubles with. You can also get hashmatch errors when there are two different dated versions of this particular dll on your system.

If you are sure its a positive error then the steps to resolve it are as follows:
  • First, go to this website: https://www.microsoft.com/en-us/software-download/techbench
  • Scroll down to lower half of the webpage that opens where you will find Windows 10 ISO downloads.
    • Select an edition and click Confirm
    • Select a language pack your system will be using then click Confirm
    • Finally, select either 32-bit or 64-bit based on the System architecture of your computer

      If you are not sure what your System Architecture is then left-click Start | left-click Settings | left-click System | then in left pane left-click About. A display will appear and note what it says next to System type. It will say here whether you are 32-bit or 64-bit.
  • Note: The edition and language you choose needs to match your current Windows 10 installation

  • The default location for downloads is your Downloads folder unless you tell the ISO file to be save elsewhere. When the download is complete go to the location you saved this file to and if necessary use the Search box in to right corner of folder and simply type 1511 in the search box to quickly locate the download. Upon locating the ISO file, right-click on it and select Mount.

    Once mounted the ISO file will open in a folder with some sub folders and a few files including Setup.

    Left-click on the Resources folder to open it. Now scroll down and locate Install.wim file.

    Right-click on Install.wim and select Copy.

    Next go to your Desktop then right-click and choose New > Folder. Name this new folder mount.

    Next open your new mount folder then right-click inside it and choose Paste. This will place a copy of Install.wim on your Desktop inside the folder you just created called mount.

    You can now close the ISO folder you mounted and any other folders and applications open so that you are staring at your Desktop.
  • The next stage is to use elevated commands to mount your file then run some scans. To do this you need to right-click on the Start icon in bottom left corner of your computer then Left-click on Command Prompt (Admin).

    A UAC prompt will pop up. Click Yes.

    You will now see the Command Prompt: Administrator window.
  • In side this command prompt window type or copy & paste the following command:

    Code:
    Dism /mount-wim /wimFile:%USERPROFILE%\Desktop\install.wim /index:1 /MountDir:%USERPROFILE%\Desktop\mount

    Press Enter key to execute.

    This will mount the Install.wim file making it accessible for the scans to follow.
  • Next in the same command prompt type or copy & paste the following command:

    Code:
    Dism /Online /Cleanup-Image /CheckHealth

    Press Enter key to execute.

    This will check current System image health and mark the Registry with flags for any issues, such as your dll issue you are concerned about. These flags will be found in the next scan command and actioned.
  • Next in the same command prompt type or copy & paste the following command:

    Code:
    Dism /Online /Cleanup-Image /RestoreHealth /Source:%USERPROFILE%\Desktop\mount\windows /LimitAccess

    Press Enter key to execute.

    The LimitAccess flag will ensure the repair scan only refers to your mounted file and does not go to Windows Update servers seeking files, or to any other backed up system files which in this case presumably are corrupted hence your SFC scan was not able to repair the DLL you mentioned.
  • Next in the same command prompt window type or copy & paste the following command:

    Code:
    Dism /unmount-wim /Mountdir:%USERPROFILE%\Desktop\mount /discard

    Press Enter key to execute.

    This unmounts the image and discards temporary files created during this process.
  • Finally, in the same command prompt window type SFC /SCANNOW then press Enter key to execute.

All going to plan this error you were seeing will no longer appear.


Regards,

Regedit32
 
Joined
Jun 6, 2016
Messages
53
Reaction score
2
Hi Moiseyo,

There are occasionions when a SFC report returns a false/positive error with the particular dll file you are having troubles with. You can also get hashmatch errors when there are two different dated versions of this particular dll on your system.

If you are sure its a positive error then the steps to resolve it are as follows:
  • First, go to this website: https://www.microsoft.com/en-us/software-download/techbench
  • Scroll down to lower half of the webpage that opens where you will find Windows 10 ISO downloads.
    • Select an edition and click Confirm
    • Select a language pack your system will be using then click Confirm
    • Finally, select either 32-bit or 64-bit based on the System architecture of your computer

      If you are not sure what your System Architecture is then left-click Start | left-click Settings | left-click System | then in left pane left-click About. A display will appear and note what it says next to System type. It will say here whether you are 32-bit or 64-bit.
  • Note: The edition and language you choose needs to match your current Windows 10 installation

  • The default location for downloads is your Downloads folder unless you tell the ISO file to be save elsewhere. When the download is complete go to the location you saved this file to and if necessary use the Search box in to right corner of folder and simply type 1511 in the search box to quickly locate the download. Upon locating the ISO file, right-click on it and select Mount.

    Once mounted the ISO file will open in a folder with some sub folders and a few files including Setup.

    Left-click on the Resources folder to open it. Now scroll down and locate Install.wim file.

    Right-click on Install.wim and select Copy.

    Next go to your Desktop then right-click and choose New > Folder. Name this new folder mount.

    Next open your new mount folder then right-click inside it and choose Paste. This will place a copy of Install.wim on your Desktop inside the folder you just created called mount.

    You can now close the ISO folder you mounted and any other folders and applications open so that you are staring at your Desktop.
  • The next stage is to use elevated commands to mount your file then run some scans. To do this you need to right-click on the Start icon in bottom left corner of your computer then Left-click on Command Prompt (Admin).

    A UAC prompt will pop up. Click Yes.

    You will now see the Command Prompt: Administrator window.
  • In side this command prompt window type or copy & paste the following command:

    Code:
    Dism /mount-wim /wimFile:%USERPROFILE%\Desktop\install.wim /index:1 /MountDir:%USERPROFILE%\Desktop\mount

    Press Enter key to execute.

    This will mount the Install.wim file making it accessible for the scans to follow.
  • Next in the same command prompt type or copy & paste the following command:

    Code:
    Dism /Online /Cleanup-Image /CheckHealth

    Press Enter key to execute.

    This will check current System image health and mark the Registry with flags for any issues, such as your dll issue you are concerned about. These flags will be found in the next scan command and actioned.
  • Next in the same command prompt type or copy & paste the following command:

    Code:
    Dism /Online /Cleanup-Image /RestoreHealth /Source:%USERPROFILE%\Desktop\mount\windows /LimitAccess

    Press Enter key to execute.

    The LimitAccess flag will ensure the repair scan only refers to your mounted file and does not go to Windows Update servers seeking files, or to any other backed up system files which in this case presumably are corrupted hence your SFC scan was not able to repair the DLL you mentioned.
  • Next in the same command prompt window type or copy & paste the following command:

    Code:
    Dism /unmount-wim /Mountdir:%USERPROFILE%\Desktop\mount /discard

    Press Enter key to execute.

    This unmounts the image and discards temporary files created during this process.
  • Finally, in the same command prompt window type SFC /SCANNOW then press Enter key to execute.

All going to plan this error you were seeing will no longer appear.


Regards,

Regedit32

With respect Regedit32

I soted om first mount - see picture
 

Attachments

  • mount.png
    mount.png
    19.7 KB · Views: 802

Regedit32

Moderator
Joined
Mar 4, 2016
Messages
3,617
Reaction score
1,139
Hi moiseye,
  • Open File Explorer
  • Navigate to your Desktop\mount folder and open it
  • Right-click on the install.wim file and select Properties
  • When the Properties information opens make sure you are on the General tab then check the Attributes at bottom. If the Read-only is checked then remove the check
  • Next click the Security tab
  • Left-click once on the User account you are using to mount this file.
  • With that User account now high lighted check beneath to make sure this User account has Read, Write and Modify permissions checked in the Allow column. If not you will need to edit this to get these permissions. To be able to get these permissions you will need to take ownership of the file, install.wim
  • To take ownership do the following:

    Open an elevated command prompt by by right-clicking on Start then left-clicking on Command Prompt (Admin). When the UAC prompt pops up click Yes

    I'm assuming the User account you are using to mount the image belongs to the Administrator Group. If it does not ignore the next command and use the alternate command instead.

    At the command prompt type or copy & paste the following command:

    Code:
    takeown /F "%USERPROFILE%\Desktop\mount\install.wim" /A

    Alternate command to be used if your User account does not belong to the Administrator Group:

    Code:
    takeown /F "%USERPROFILE%\Desktop\mount\install.wim" /R

  • Now that you own file you ought to be able to execute that command giving you troubles.
  • if the error message persists then modify the command to the following:

    Code:
    Dism /mount-wim /wimFile:%USERPROFILE%\Desktop\mount\install.wim /index:1

  • If both options fail then this would suggest your core components for DISM are corrupted and to resolve this we may be able to sort things using an elevated PowerShell command instead; however, generally when this core fails its simpler to re-install Windows 10 to resolve issues.

Regards,

Regedit32
 
Joined
Jun 6, 2016
Messages
53
Reaction score
2
Hi Moiseyo,

There are occasionions when a SFC report returns a false/positive error with the particular dll file you are having troubles with. You can also get hashmatch errors when there are two different dated versions of this particular dll on your system.

If you are sure its a positive error then the steps to resolve it are as follows:
  • First, go to this website: https://www.microsoft.com/en-us/software-download/techbench
  • Scroll down to lower half of the webpage that opens where you will find Windows 10 ISO downloads.
    • Select an edition and click Confirm
    • Select a language pack your system will be using then click Confirm
    • Finally, select either 32-bit or 64-bit based on the System architecture of your computer

      If you are not sure what your System Architecture is then left-click Start | left-click Settings | left-click System | then in left pane left-click About. A display will appear and note what it says next to System type. It will say here whether you are 32-bit or 64-bit.
  • Note: The edition and language you choose needs to match your current Windows 10 installation

  • The default location for downloads is your Downloads folder unless you tell the ISO file to be save elsewhere. When the download is complete go to the location you saved this file to and if necessary use the Search box in to right corner of folder and simply type 1511 in the search box to quickly locate the download. Upon locating the ISO file, right-click on it and select Mount.

    Once mounted the ISO file will open in a folder with some sub folders and a few files including Setup.

    Left-click on the Resources folder to open it. Now scroll down and locate Install.wim file.

    Right-click on Install.wim and select Copy.

    Next go to your Desktop then right-click and choose New > Folder. Name this new folder mount.

    Next open your new mount folder then right-click inside it and choose Paste. This will place a copy of Install.wim on your Desktop inside the folder you just created called mount.

    You can now close the ISO folder you mounted and any other folders and applications open so that you are staring at your Desktop.
  • The next stage is to use elevated commands to mount your file then run some scans. To do this you need to right-click on the Start icon in bottom left corner of your computer then Left-click on Command Prompt (Admin).

    A UAC prompt will pop up. Click Yes.

    You will now see the Command Prompt: Administrator window.
  • In side this command prompt window type or copy & paste the following command:

    Code:
    Dism /mount-wim /wimFile:%USERPROFILE%\Desktop\install.wim /index:1 /MountDir:%USERPROFILE%\Desktop\mount

    Press Enter key to execute.

    This will mount the Install.wim file making it accessible for the scans to follow.
  • Next in the same command prompt type or copy & paste the following command:

    Code:
    Dism /Online /Cleanup-Image /CheckHealth

    Press Enter key to execute.

    This will check current System image health and mark the Registry with flags for any issues, such as your dll issue you are concerned about. These flags will be found in the next scan command and actioned.
  • Next in the same command prompt type or copy & paste the following command:

    Code:
    Dism /Online /Cleanup-Image /RestoreHealth /Source:%USERPROFILE%\Desktop\mount\windows /LimitAccess

    Press Enter key to execute.

    The LimitAccess flag will ensure the repair scan only refers to your mounted file and does not go to Windows Update servers seeking files, or to any other backed up system files which in this case presumably are corrupted hence your SFC scan was not able to repair the DLL you mentioned.
  • Next in the same command prompt window type or copy & paste the following command:

    Code:
    Dism /unmount-wim /Mountdir:%USERPROFILE%\Desktop\mount /discard

    Press Enter key to execute.

    This unmounts the image and discards temporary files created during this process.
  • Finally, in the same command prompt window type SFC /SCANNOW then press Enter key to execute.

All going to plan this error you were seeing will no longer appear.


Regards,

Regedit32

----------------------------------------------------------------------
Hello Regedit32
I done
no Luck so far


C:\WINDOWS\system32>Dism /mount-wim /wimFile:%USERPROFILE%\Desktop\install.wim /index:1 /MountDir:%USERPROFILE%\Desktop\mount

Deployment Image Servicing and Management tool
Version: 10.0.10586.0


Error: 0xc1420114

The user attempted to mount to a directory that is not empty. This is not supported.
The DISM log file can be found at C:\WINDOWS\Logs\DISM\dism.log

===============================================
At that point a amuse that mount done already
=============================================
C:\WINDOWS\system32>Dism /Online /Cleanup-Image /RestoreHealth /Source:%USERPROFILE%\Desktop\mount\windows /LimitAccess

Deployment Image Servicing and Management tool
Version: 10.0.10586.0

Image Version: 10.0.10586.0

[==========================100.0%==========================]

Error: 0x800f081f

The source files could not be found.
Use the "Source" option to specify the location of the files that are required to restore the feature. For more information on specifying a source location, see http://go.microsoft.com/fwlink/?LinkId=243077.

The DISM log file can be found at C:\WINDOWS\Logs\DISM\dism.log

C:\WINDOWS\system32>Dism /Online /Cleanup-Image /CheckHealth

Deployment Image Servicing and Management tool
Version: 10.0.10586.0

Image Version: 10.0.10586.0

The component store is repairable.
The operation completed successfully.

C:\WINDOWS\system32>
 

Attachments

  • dism.zip
    407.4 KB · Views: 375
  • notEmpty.png
    notEmpty.png
    16.4 KB · Views: 725
Joined
Jun 6, 2016
Messages
53
Reaction score
2
----------------------------------------------------------------------
Hello Regedit32
I done
no Luck so far


C:\WINDOWS\system32>Dism /mount-wim /wimFile:%USERPROFILE%\Desktop\install.wim /index:1 /MountDir:%USERPROFILE%\Desktop\mount

Deployment Image Servicing and Management tool
Version: 10.0.10586.0


Error: 0xc1420114

The user attempted to mount to a directory that is not empty. This is not supported.
The DISM log file can be found at C:\WINDOWS\Logs\DISM\dism.log

===============================================
At that point a amuse that mount done already
=============================================
C:\WINDOWS\system32>Dism /Online /Cleanup-Image /RestoreHealth /Source:%USERPROFILE%\Desktop\mount\windows /LimitAccess

Deployment Image Servicing and Management tool
Version: 10.0.10586.0

Image Version: 10.0.10586.0

[==========================100.0%==========================]

Error: 0x800f081f

The source files could not be found.
Use the "Source" option to specify the location of the files that are required to restore the feature. For more information on specifying a source location, see http://go.microsoft.com/fwlink/?LinkId=243077.

The DISM log file can be found at C:\WINDOWS\Logs\DISM\dism.log

C:\WINDOWS\system32>Dism /Online /Cleanup-Image /CheckHealth

Deployment Image Servicing and Management tool
Version: 10.0.10586.0

Image Version: 10.0.10586.0

The component store is repairable.
The operation completed successfully.

C:\WINDOWS\system32>


====================================================

I rebooted computer and first command:

Microsoft Windows [Version 10.0.10586]
(c) 2015 Microsoft Corporation. All rights reserved.

C:\WINDOWS\system32>Dism /mount-wim /wimFile:%USERPROFILE%\Desktop\install.wim /index:1 /MountDir:%USERPROFILE%\Desktop\mount

Deployment Image Servicing and Management tool
Version: 10.0.10586.0


Error: 0xc1420114

The user attempted to mount to a directory that is not empty. This is not supported.

The DISM log file can be found at C:\WINDOWS\Logs\DISM\dism.log

C:\WINDOWS\system32>

----------------------------------------------------------------------
How i can find and clean that folder
 

Regedit32

Moderator
Joined
Mar 4, 2016
Messages
3,617
Reaction score
1,139
Hi moiseye,

Glad you managed to resolve your issue. I suspect we have very different time zones, so sorry I missed a few responses from you.

Anyway, it appears you are back up and running normally now.
 
Joined
Oct 1, 2014
Messages
2,334
Reaction score
358
That file is a known problem with Win 10. Microsoft even posted a thread about it since a Nvidia driver install will replace the version Microsoft uses, thus the discrepancy... ignore it.
 

Ask a Question

Want to reply to this thread or ask your own question?

You'll need to choose a username for the site, which only take a couple of moments. After that, you can post your question and our members will help you out.

Ask a Question

Top